
Paw Print Keepsake & Ornament
Create a delightful paw print ornament or keepsake featuring your beloved pet's paw with this simple do-it-yourself project using just three common ingredients from your pantry. Here's a step-by-step guide:
Ingredients:
- 1 cup salt
- 1 cup flour
- ½ cup water
- Parchment paper
- Optional: decorations like glitter, paint or ribbon

Step 1: Mix
- In a mixing bowl, combine 1 cup of salt and 1 cup of flour
- Gradually add ½ cup of water while stirring continuously until the mixture forms a firm, dough-like texture
- Adjust with more water or flour if needed
- The dough should be pliable, akin to playdough, and hold together well
Important Note: This dough is intended for crafting purposes only and should not be ingested by pets. Ensure your pet doesn't taste it during the process.

Step 2: Roll & Cut
- Place the dough ball between two sheets of parchment paper.
- Roll out the dough using a rolling pin until it reaches a thickness of approximately ½ inch.
- Use a cookie cutter or the rim of an inverted glass to cut out circles or shapes of your choice.
- Reuse the excess dough by forming it into a ball and repeating this process until all the dough is used.

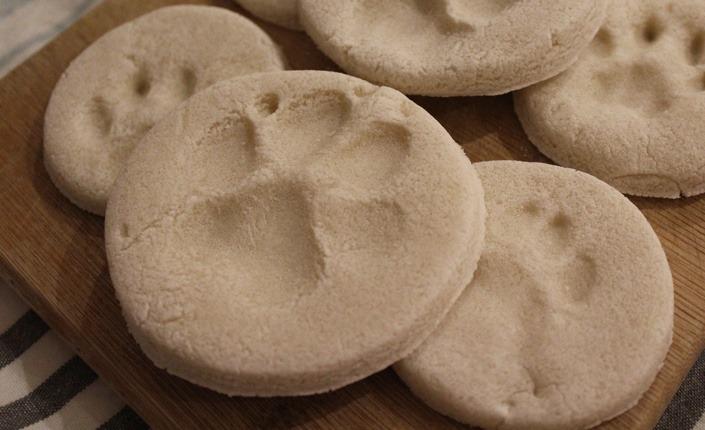
Step 3: Get Your Cat or Dog's Paw Print
- Lay the trimmed circles on a flat surface, such as a plate lined with parchment paper or a small cutting board
- Gently but firmly press your pet's paw into the dough and hold it for a few seconds to create a clear imprint
- Try to keep your pet as still as possible for the best results
- Afterward, wipe their paws clean with a damp cloth
Optional Add-Ons:
- Use a straw to create a hole in the ornament for hanging
- Personalize the ornament by writing your pet's name or adding decorative designs along the edges using a toothpick
- Incorporate additional patterns along the edges by pressing leaves or pinecones into the dough for a botanical touch

Step 4: Bake
- Allow the paw print ornaments to air dry for a few days or expedite the process by baking them
- Preheat your oven to 350 degrees F (175 degrees C)
- Place the ornaments on a baking sheet and bake for 20 to 30 minutes, or until they are completely dry
- Remove the ornaments from the oven and let them cool before proceeding to the next step

Step 5: Decorate
You can leave the paw print ornaments in their natural state for a rustic look, or get creative by painting them, adding glitter, or attaching beads to make them more decorative.
Now, you have a beautiful and personalized keepsake of your pet's paw print to cherish or share with friends and family. If you decide to embark on this DIY project with your furry friend, don't forget to showcase and share your masterpiece with us on Facebook, Twitter, or Instagram for all to admire!
If you liked this project, try another Pet DIY or recipe on our blog!